“Tussey Mussey”

As my first project I was given the task of making a “Tussey Mussey” which was a brooch worn by victorians that held a little bit of water and some flowers. I made this by trying my best to use the one sheet of metal I was given however, this did not go to plan and i had to use extra metal. I marked off all the pieces i needed on the metal and cut them all out- i made a cone to start off with, followed by the half tube and then the dome. After this i cut the dome and cone in half, soldered them to either end of the tube.

Then i soldered the half piece not a flat sheet of metal. i proceeded to cut as close as i could so that i could file the excess down and blend the edges of the back with the rest of piece. i went on to make the brooch part of the piece using the same techniques i used for the stone set bar brooch. once this was complete i filed and polished so that it was ready to hand in for the assessment.

I both enjoyed and did not enjoy this particular task as the filing was the most tedious part and sometimes parts would not solder so it took me longer to make than i thought it would.

Stone set Samples

I did not enjoy my first go at stone setting of this type as I messed up on both the round and 4 claw settings, however, I’m to going to let this stop me and i will be having more goes so that I can improve my stone setting skills as I want to include stone setting in my designs in my future career. I had to use a burr ball and a 90° bearing cutter to cut and file away small amount of metal so that the glass stones could comfortable sit in the setting from there I uses my burnisher and needle files to set the stone and to clean up the setting. When I was using the bearing cutter and burr ball i messed up on the removing metal as this was my first time doing this i didn’t think i would to too well so the tutor who was taking our class ad to help me fix them .

Burnisher and Pusher

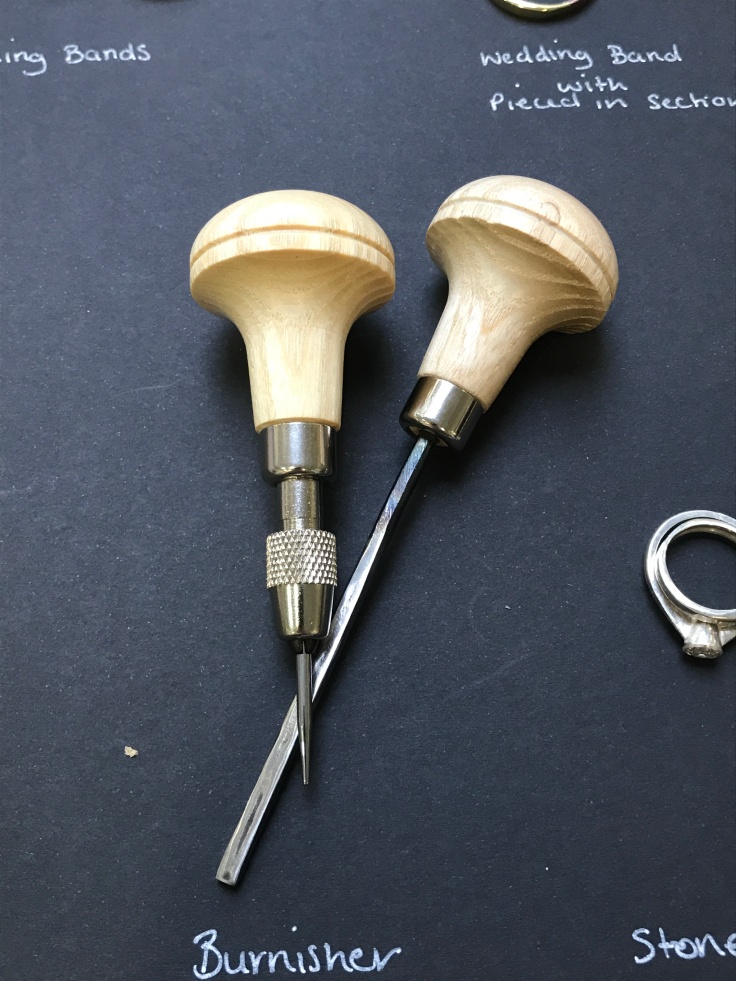
IMG_1020I had to make a burnisher and pusher for stone setting as these are essential tools for that particular process. To make the “Burnisher” I used a broken pendant motor drill piece and used the table top motor with a grinder type adapter, which I used to make the end into a point- perfect for stone setting. To make the “Pusher” I used a metal rod which I heated up and used a hammer and anvil to shape it into a square rod. I then filed the other end into a point as to put it into a handle.

I found this assignment relatively easy however filing the pusher was the most tedious and hand hurting part of the process. It was, however, interesting to know how to make certain tools.


Cast Ring with Pieced in Section

I was given a cast ring that had setting cast into it, which I had to piece up. I started by cleaning up the ring using our saw and file to get rid of any excess pieces such as the one in the second photo. From there I went onto cutting the ring and placing it on my ring mandrel, using a combination of pushing the ring on the mandrel and using pliers to pull the ring apart, I made it the new size it had to be. Using the same size and material of wire, I ran it through the rolling mill making it square and then squashed it making it flat.

I went on to anneal this and measured the amount needed to fill the gap in order to piece it up. Then I cut the amount needed and proceeded to file each end to a point and filed a v shape groove into each end of the ring and slid the piece into the ring. After doing this i soldered it into place and then filed it so that it did not look like anything had changed.

I found this tricky as the piece I used was slightly to wide and it took what felt like forever to file it down on the ring. However this is a great technique to know as it will help with future jobs and future career and jewellery.

Section of Handmade Chain

I had to make a section of chain out of wire, I made this of larger scale but still kept it small as i felt this would be an easier size to start with when hand-making chain. To do this I put a metal pole into a vice and holding onto one end of the wire in one hand with pliers and pulling on the rest of the wire with my other hand I wrapped it round the pole tightly together making sure each ring was tightly placed on top of each other to ensure each one was the same size.

Once I had finished wrapping the wire around the pole I took it off and then wrapped the  links in masking tape in order to keep the links in place while I cut them to start making the chain.

Once all of them had been cut I proceeded to file the cut ends so that I could push them together for when I soldered them together using the micro-welder. After soldering them together I used my round nose pliers to to lengthen each chain link to create a paperclip style chain.

Doing this was relatively easy however the soldering part was the trickiest as using the micro-welder ended up with multiple melted chain links. (note to self- practice more with the micro-welder and scrap wire)…

Stone Set Bar Brooch

I had to create a broach with a set stone (glass stone)- to do this I had to use some of the spare tubing I had left over from the hinged ring and some folded metal sheet to create a slot which the wire for the clasp would sit into and lock into place on the other end of the broach in folded metal. After doing this I created filed the plain sheet onto which my stone would be set, I then went on to create my own bezel setting for the stone to sit in. After making to setting I used the ink from a biro to mark where the holes for the setting would go, drilled the holes and hammered the setting into place. I then soldered the two pieces on the back, set the stone, put the wire through and then polished the broach ready for assessment.

Hinged Ring

I had to create a hinged ring and to do this I started by making a tube, after this I made a ring using sheet metal, soldered it and cut it in half using the solder line as the starting point. I then went on to measure out the length of tube I needed and used the tube cutter and my saw to cut it. I proceeded to mark out the areas i needed to cut half the tube off and then soldered the pieces of tube onto the sides of the ring. after this i got wire and cut a piece that fit into one side which i then hammered the two ends pocking out to keep it in place. I went on to cut a piece with a loop that fit into the other side and made a chain using smaller links and drilled a whole into the ring to which i added the chain and attached the other end of the chain to the wire with a loop.

Plain Wedding Band

IMG_0556

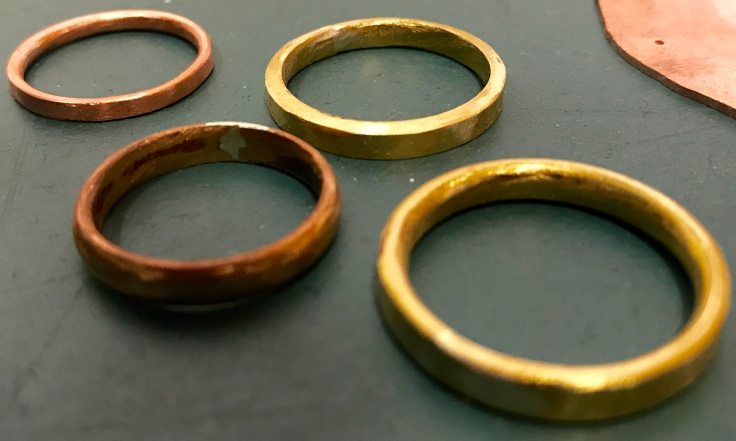
I was given a piece of round brass wire, which I then annealed and placed through the rolling mill in the D-shaped groove. I used this technique to create a classic wedding band shaped ring. Having rolled it through the mill I used half round pliers to bend the D-shaped wire into a ring shape. Once this had been achieved, I proceeded to cut the excess wire off using my saw frame and a size two saw blade and solder the two ends of the ring together using hard solder. I then went on to, placing the ring on the ring mandrel  and with a raw hide mallet, hitting the ring into a proper ring shape. To complete the ring I went on to file away the excess solder and any scratches before I used several grades of emery paper ranging from coarse to fine to buff the ring before polishing it.

I didn’t find this ring tricky to do as I have made rings before and therefore I feel that I will make more of these rings in the future, using different metals such as silver or gold which I could go on to sell.


Blog at WordPress.com.

Up ↑